Crane Lift Planning for Contractors: Prevent Failures at 75% Capacity
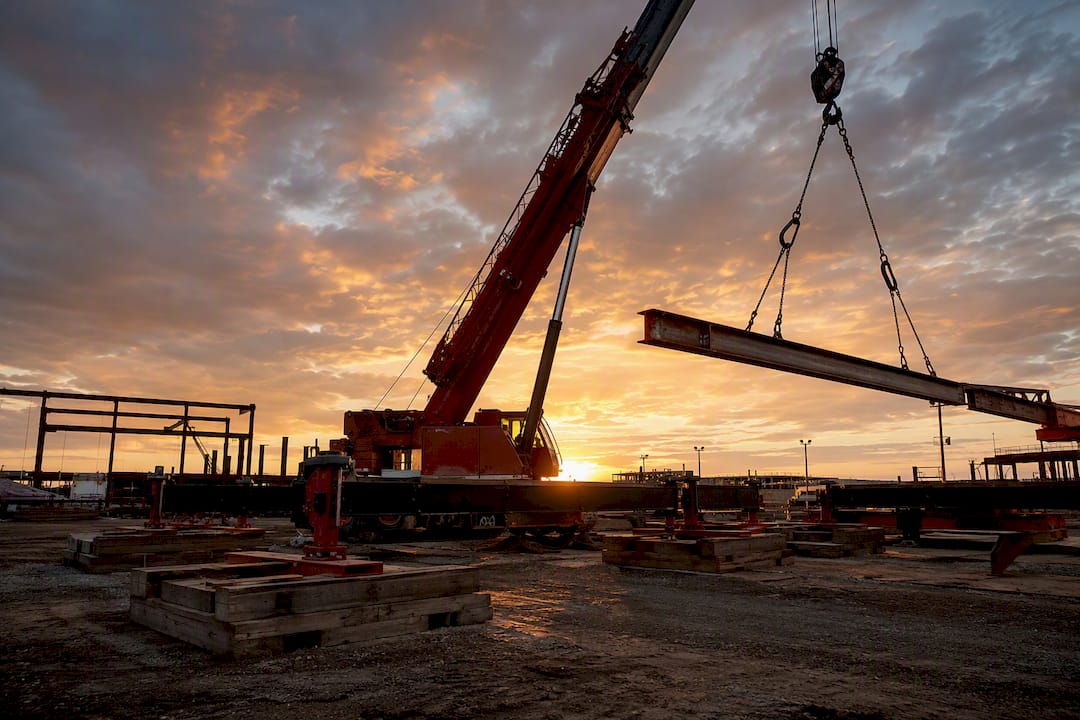
A crane lift plan is a written, signed record of how a load will be lifted safely, covering the crane, the rigging, the site, and the crew. It becomes a critical lift plan when the load is close to the crane’s rated capacity, the job requires two or more cranes, the load passes over occupied areas, or the rigging is non-routine. Getting this document right protects people, keeps the project on schedule, and gives you a paper trail when someone asks how the decision was made.
TL;DR:
- A crane lift plan is required for multi-crane lifts, loads passing over occupied areas, or when the load approaches the crane’s capacity, regardless of regulation thresholds.
- It must include specific details such as load weight verified by documented sources, rigging hardware specifications, site conditions, and personnel qualifications, ensuring traceability and safety.
- Conducting a pre-lift meeting with all roles defined, signatures obtained, and safety measures confirmed is essential to prevent last-minute mistakes and clarify responsibilities.
- Ground stability checks, including soil bearing capacity and proper cribbing, are critical to avoid tip-overs caused by inadequate support or recent ground disturbance.
- Maintaining comprehensive documentation, including the signed lift plan, rigging inspection tags, and load verification records, is vital for accountability and incident review.
Table of Contents
- When Is a Crane Lift Plan Required?
- What Goes Into a Crane Lift Plan?
- How Do You Build a Crane Lift Plan Step by Step?
- How Do You Calculate Load Weight and Center of Gravity?
- How Do You Select and Inspect Rigging for a Crane Lift?
- How Do You Check Ground Conditions Before a Crane Lift?
- Who Attends the Pre-Lift Meeting and What Gets Signed?
- What Documentation Should You Keep After a Lift?
- Which Tools and Templates Actually Speed Up Lift Planning?
- How Cornelius Wrecking Builds and Verifies Its Lift Plans
- What Actually Prevents Crane Lift Incidents?
- Get a Lift Plan Built by a Crew That Executes It
- Where to Find the Standards and Templates Behind This Guide
- Sources
When Is a Crane Lift Plan Required?
You need a written lift plan far more often than most site teams assume. OSHA 29 CFR 1926.14321432) mandates a formal, written plan any time a lift involves more than one crane, and it backs the broader expectation that a qualified person reviews the operation before the load leaves the ground. That single regulation is the floor, not the ceiling. Most owners, insurers, and general contractors set their own thresholds that trigger a plan well before OSHA technically requires one.
Project specifications frequently demand a lift plan for any pick over a certain tonnage, any lift near power lines, or any pick that involves a tandem or multi-crane configuration. Some owners require a professional engineer’s stamp on the rigging design before they will allow the crane on site. Insurance carriers sometimes make a written plan a condition of coverage for heavy or unusual lifts, and site-specific safety procedures often fold crane work into a broader permit-to-work system that will not release the crew without a signed document in hand.
The practical case for planning holds up even where the regulation does not force your hand:
- A documented plan catches load-chart errors and rigging mismatches before they become field problems.
- It gives the crew a shared reference during the pre-lift meeting instead of relying on verbal instructions.
- It shortens delays caused by last-minute questions about ground conditions, exclusion zones, or crane capacity.
- It creates a defensible record if an incident review or insurance claim ever asks what was known and decided beforehand.
None of that requires a critical lift. Even routine picks benefit from a short written plan, because the discipline of writing it down forces someone to actually verify the numbers instead of trusting a guess.
What Goes Into a Crane Lift Plan?
A complete plan reads like an audit trail. Anyone unfamiliar with the job should be able to open it and understand the crane, the load, the site, and the people involved without asking a follow-up question. Procore’s lift plan guidance lists ten core fields that show up in nearly every credible template, and they map to a logical sequence:
- Project and equipment identification. Project name, location, date, crane make and model, and the personnel assigned to the lift.
- Load description. What is being lifted, its dimensions, and any special handling notes (fragile components, unusual shape, hazardous contents).
- Total weight and center of gravity. The verified weight of the load plus every piece of rigging hardware between the hook and the load.
- Rigging list. Every sling, shackle, spreader bar, and softener, with rated capacity and configuration noted for each.
- Crane configuration and load-chart reference. Boom length, radius, counterweight, and the exact chart page used to confirm capacity at that configuration.
- Site diagram. A sketch or drawing showing crane position, load path, obstructions, and swing radius.
- Exclusion zones. Marked boundaries showing where non-essential personnel cannot enter during the pick.
- Ground-bearing notes. Outrigger footprint, cribbing dimensions, and any soil or pavement limitations.
- Environmental limits. Wind speed thresholds, visibility requirements, and any weather-related stop conditions.
- Personnel and sign-off. Qualifications of the operator, rigger, and signal person, inspection records, and space for pre-lift meeting signatures.
Attach the supporting math and drawings directly to the plan rather than referencing them from memory. A BPA critical-lift template shows this well: it dedicates specific fields to bearing-pressure attachments and rigging tables, so the reviewer never has to hunt down a separate spreadsheet to check the work.
How Do You Build a Crane Lift Plan Step by Step?
Treat lift planning as a sequence, not a form you fill out in one sitting. Skipping the order usually means redoing a step once a later one exposes a bad assumption.
- Gather verified load data and determine center of gravity. Pull weight from manufacturer documentation, a certified scale ticket, or a documented engineering calculation. Never plan around a rounded estimate.
- Select the crane and confirm the exact load chart. Match the crane’s configuration (boom length, radius, counterweight) to the specific chart page, not a general capacity number pulled from a spec sheet.
- Run ground-bearing checks. Confirm the ground can support outrigger loads at full extension, and specify cribbing size and placement in writing.
- Design and inspect the rigging. Calculate the force on each sling, shackle, and spreader bar at the actual lift angle, not at a theoretical vertical pull.
- Draw the lift path and exclusion zones. Mark the path from pick point to set point, identify overhead obstructions, and define the boundary where non-essential crew cannot stand.
- Plan communications. Assign a signal person, confirm radio channels or hand signals, and identify where spotters will stand.
- Hold the pre-lift meeting. Walk the entire crew through the plan and collect signatures confirming everyone understands their role.
- Perform a test pick. Raise the load a few inches, hold, and check rigging tension, crane stability, and communications before committing to the full lift.
- Execute the full lift and document the outcome. Note any deviations from the plan, unexpected conditions, or field adjustments.
Pro Tip: Run the test pick even on lifts you’ve done a dozen times before. A spreader bar that looked fine on paper sometimes reveals an uneven load distribution the moment it clears the ground, and that’s the cheapest place in the whole sequence to catch it.
This sequence matters because a lift plan works as a proactive blueprint. Forcing verification of every input before the crane moves is what prevents the kind of last-minute scramble that turns into either a costly delay or a serious safety event. Skipping straight to rigging selection without confirmed weight data is the single most common shortcut that undoes an otherwise solid plan.
How Do You Calculate Load Weight and Center of Gravity?
Every credible lift plan starts with a number you can defend, not a number you assumed. Experienced riggers consistently point to unverified weight as a leading root cause behind crane incidents, which is why center-of-gravity guidance pushes practitioners toward documented sources rather than field guesses.
Acceptable sources for load weight fall into three categories:
- Manufacturer data. Equipment nameplates, shop drawings, or vendor-supplied weight certificates for fabricated components.
- Certified scale weighing. A weighed reading from a calibrated scale, documented with a ticket or printout attached to the plan.
- Documented engineering calculation. A material takeoff with density, volume, and dimensions clearly shown, reviewed by a qualified person.
Loose estimates, “about” figures, or numbers pulled from memory of a similar past job do not belong in a critical lift plan.
Once you have the base load weight, add every piece of rigging hardware between the hook and the load: hook block, headache ball, slings, shackles, spreader bars, and any jib or attachment. Each of these adds real weight that eats into the crane’s available capacity. Show the math in the plan itself: base load plus rigging deductions equals total suspended weight, then divide that figure by the crane’s rated capacity at the planned radius and boom configuration to get your percent of capacity.
Center of gravity needs the same rigor. For irregular or asymmetric loads, a qualified person should calculate or verify the CG location and mark it on the lift drawing, since an off-center load shifts the actual working radius in ways the crane operator cannot see from the cab.

How Do You Select and Inspect Rigging for a Crane Lift?
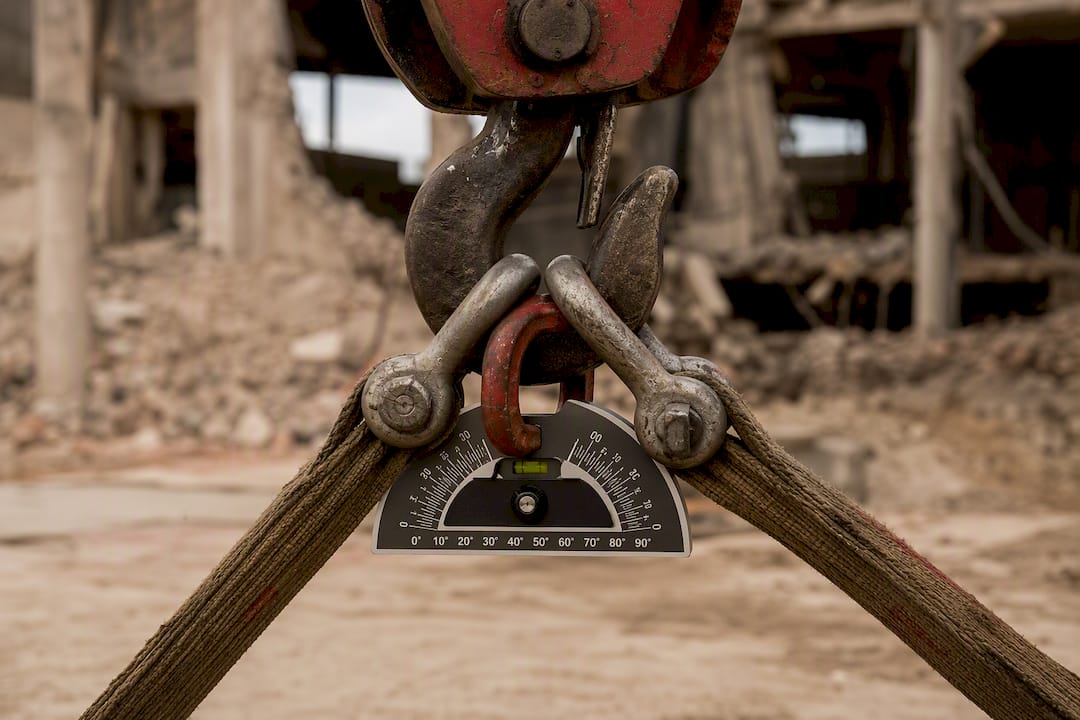
Rigging selection comes down to matching hardware capacity to load geometry, then confirming a safety margin on paper before anything touches the load. Choose slings based on the lift angle, not just the vertical weight. A sling rated for 10 tons in a straight vertical pull loses significant capacity as the angle from vertical increases, so the rigging table in your plan needs the actual sling angle documented, not assumed.
Synthetic slings work well for finished surfaces where wire rope could cause damage, but wire rope generally holds up better in high-heat or abrasive environments. Spreader bars and softeners come into play any time a load’s shape would otherwise force sling angles that compromise capacity or risk crushing an edge. Shackles need to match the sling’s working load limit exactly. A mismatched shackle is one of the more common rigging errors that never shows up until the load is already in the air.
Every piece of gear needs a current inspection tag, and the plan should note the tag date, capacity, and condition for each item used. Watch for:
- Cracked or deformed shackles and hooks.
- Cut strands, abrasion, or discoloration on wire rope.
- Fraying, cuts, or chemical damage on synthetic slings.
- Bent or pitted spreader bar connection points.
Non-catalog rigging, meaning custom spreader beams or multi-sling assemblies built for a specific job, typically needs a professional engineer’s review before it goes on the plan. SLAC’s institutional lift form requires exactly this kind of force calculation for anything outside standard, catalog-rated hardware. For high-value or unusually complex lifts, ask for proof-load certificates or third-party certification on the rigging package itself, not just the individual components. It costs little compared to the exposure of an uncertified assembly holding a six-figure load.
How Do You Check Ground Conditions Before a Crane Lift?
Outrigger tip-overs happen more often from bad ground assumptions than from mechanical failure, which is exactly why ground-bearing checks deserve their own line item in every plan rather than a passing mention. Field verification starts with three physical checks: confirming the crane is level within manufacturer tolerance, measuring the actual outrigger footprint against the pad or crib size you plan to use, and checking that cribbing sits centered and fully supported under each outrigger, not just resting on the surface.
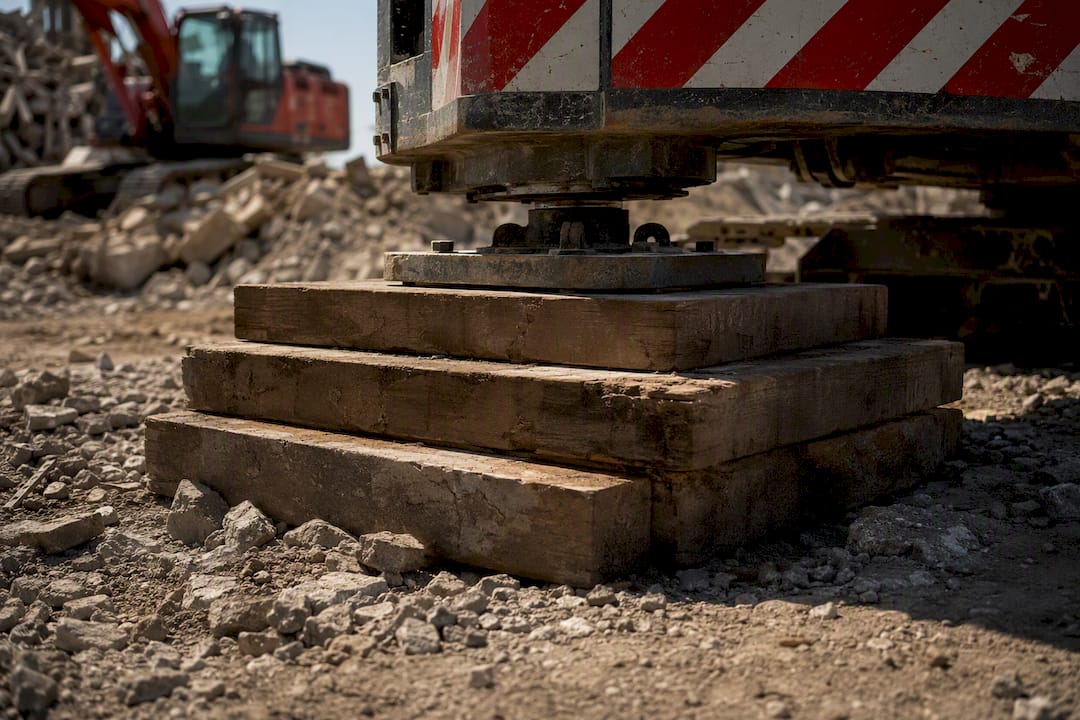
Pro Tip: Never trust a site that “looks compacted.” Recently backfilled trenches, old foundation excavations, and utility corridors can sit right under a crane pad and fail without warning, even when the surface looks identical to undisturbed ground.
Bearing pressure calculations become necessary, not optional, whenever soil conditions are unconsolidated, previously disturbed, or unknown. BPA’s template guidance treats bearing-pressure attachments as a standard field for critical lifts, and that reflects how often ground failure shows up as a root cause once an incident gets investigated. When in doubt, request a geotechnical report rather than guessing at soil bearing capacity from a visual inspection.
Common oversights worth naming directly:
- Assuming asphalt or a paved lot automatically means adequate bearing capacity.
- Skipping cribbing under one outrigger because “it’s only a small lift.”
- Failing to document crib dimensions in the plan, leaving the crew to eyeball placement in the field.
- Ignoring recent rain or freeze-thaw cycles that can soften ground overnight.
Document every mitigation you apply, whether it’s oversized cribbing, matting, or a full geotechnical sign-off, directly in the plan so the reasoning is visible to anyone reviewing it later.
Who Attends the Pre-Lift Meeting and What Gets Signed?
A pre-lift meeting works only when every role is defined before the crew walks the site. The lift director or qualified person owns the plan and has final authority to stop the lift. The operator runs the crane and confirms load-chart figures match the plan. The rigger builds and inspects the rigging package. The signal person controls all crane movement communications, and spotters watch blind spots and enforce the exclusion zone boundary.
OSHA guidance and industry practice both treat the pre-lift meeting as a documented, signed event, not a verbal walkthrough. The meeting should confirm:
- Every attendee understands the load weight, rigging configuration, and lift sequence.
- The exclusion zone boundaries are marked and everyone knows where they stand during the pick.
- Communication protocol is set, whether that’s a dedicated radio channel or a confirmed set of hand signals.
- Weather limits and stop conditions are understood by the operator and lift director alike.
- Each attendee signs the plan, acknowledging their role and understanding of the sequence.
Radio communication should run through the signal person exclusively during the actual pick, with hand signals as backup if radios fail. Exclusion zones need physical marking, cones, barrier tape, or fencing, not just a verbal instruction to “stay clear.”
What Documentation Should You Keep After a Lift?
The signed plan, rigging inspection tags, and load verification records need to stay accessible on site for the duration of the job, not filed away the moment the lift finishes. Project archives should receive a complete copy along with any field revisions made during execution.
Field revisions happen more often than plans acknowledge. If wind speed forced a delay or the crane configuration shifted at the last minute, note it directly on the plan with a timestamp rather than relying on memory afterward. Keep the following on record:
- The signed and dated lift plan, including pre-lift meeting signatures.
- Current rigging inspection tags for every component used.
- Load verification documentation (scale ticket, manufacturer data, or calculation sheet).
- Any incident notes or near-miss observations from the lift itself.
Most critical-lift forms, including SLAC’s institutional format, include formal attestation language where the lift director certifies the plan was followed as written. That signature line matters more than it looks. It’s the record that ties a specific person’s professional judgment to the lift as executed, not just as planned.
Which Tools and Templates Actually Speed Up Lift Planning?
A good template gives you fields for every attachment you’ll need before you start filling it out, not just blank space for narrative notes. At minimum, build in dedicated sections for the rigging table, the bearing-pressure calculation, the site sketch, and a signature block, so nothing gets left as a loose PDF stapled to the back.
Different tools suit different stages of the process:
- Web-based 3D lift planners help when you need to visualize swing radius, boom clearance, and obstruction conflicts before the crane arrives on site.
- Mobile field checklist apps work well for the pre-lift meeting and inspection steps, since the crew can sign off directly from a phone or tablet at the point of work.
- CAD or basic drawing software earns its place for rigging diagrams and site sketches that need to be precise enough for an engineer to review.
- Simple PDF or paper forms remain perfectly adequate for smaller, routine lifts where the overhead of a software workflow outweighs the benefit.
Reserve integrated digital workflows for projects with recurring lifts, multiple crews, or owners who require centralized document control. For a one-off pick on a small job, a well-built PDF template attached to your project file does the job without adding software overhead nobody asked for.
How Cornelius Wrecking Builds and Verifies Its Lift Plans
Cornelius Wrecking’s OSHA and asbestos abatement certifications shape how the crew approaches every lift plan, particularly on jobs involving decommissioned power plants, marine vessels, and refinery structures where the load characteristics rarely match a textbook example. A crew that already handles hazardous material identification as part of daily work applies the same documentation discipline to crane setup: verified weights, signed rigging inspections, and a ground assessment before the outriggers ever touch down.
That combination of certified personnel and a nationwide equipment fleet means the plan gets built by people who will also execute it, not handed off between separate planning and field teams. On a typical critical lift, the crew keeps an on-site checklist covering:
- Verified load weight and CG documentation.
- Current rigging inspection tags.
- Signed pre-lift meeting roster.
- Bearing-pressure notes for the outrigger footprint.
That checklist stays with the crew, not buried in a project folder somewhere off-site.
What Actually Prevents Crane Lift Incidents?
Most crane incidents I’ve studied trace back to someone trusting a number they never verified, not to a dramatic equipment failure. The load weight was “close enough,” the ground “looked fine,” or the rigging angle got eyeballed instead of measured. Conservative margins exist precisely because the field always finds the gap between what you assumed and what was actually true.
The pre-lift meeting gets treated as a formality on too many sites, when it’s really the last checkpoint where a rigger or signal person can flag something the plan missed. A crew that treats that meeting as optional is telling you something about how they’ll treat the rest of the plan.
If there’s one habit worth building into every project, it’s this: when a number feels uncertain, get a qualified person to check it before the crane moves, not after something goes wrong.
— Zach
Get a Lift Plan Built by a Crew That Executes It
Most contractors hand you a plan and a phone number for questions. Cornelius Wrecking builds the lift plan and brings the certified crew and equipment fleet that actually execute it, on the same complex jobs, power plant decommissioning, marine vessel dismantling, refinery demolition, where a generic template falls short.
Working with Cornelius Wrecking means one team handles load verification, rigging design, ground assessment, and the signed pre-lift meeting rather than juggling separate vendors for planning and execution. Our OSHA and asbestos abatement certifications mean hazardous material handling gets folded into the lift plan from day one instead of being bolted on afterward. If your project has a lift that pushes past 75% of rated capacity, involves multiple cranes, or needs non-routine rigging, reach out through Cornelius Wrecking’s site to request a quote and start the planning conversation before your schedule gets locked in.
Where to Find the Standards and Templates Behind This Guide
Start with the regulation itself: 29 CFR 1926.1432 covers the multi-crane and qualified-person requirements referenced throughout this guide. For a downloadable template with rigging tables and bearing-pressure fields already built in, BPA’s critical lift plan template is a solid working example, and SLAC’s critical lift planning and control form shows how a technical institution structures sign-offs and review.
For training, ASCE’s course on crane lift plan preparation covers load-chart reading and rigging calculation in depth. The Chubb Crane Critical Lift Resource Guide lays out critical-lift criteria clearly, and MOSAIC’s guide to lifting operations offers additional practical detail on tandem picks and high-risk rigging scenarios.
Sources
Planning a demolition or excavating project?
Get a fast, no-obligation quote from Cornelius Wrecking.
Request a Quote