Before the First Cut: Excavation Erosion Control for Contractors
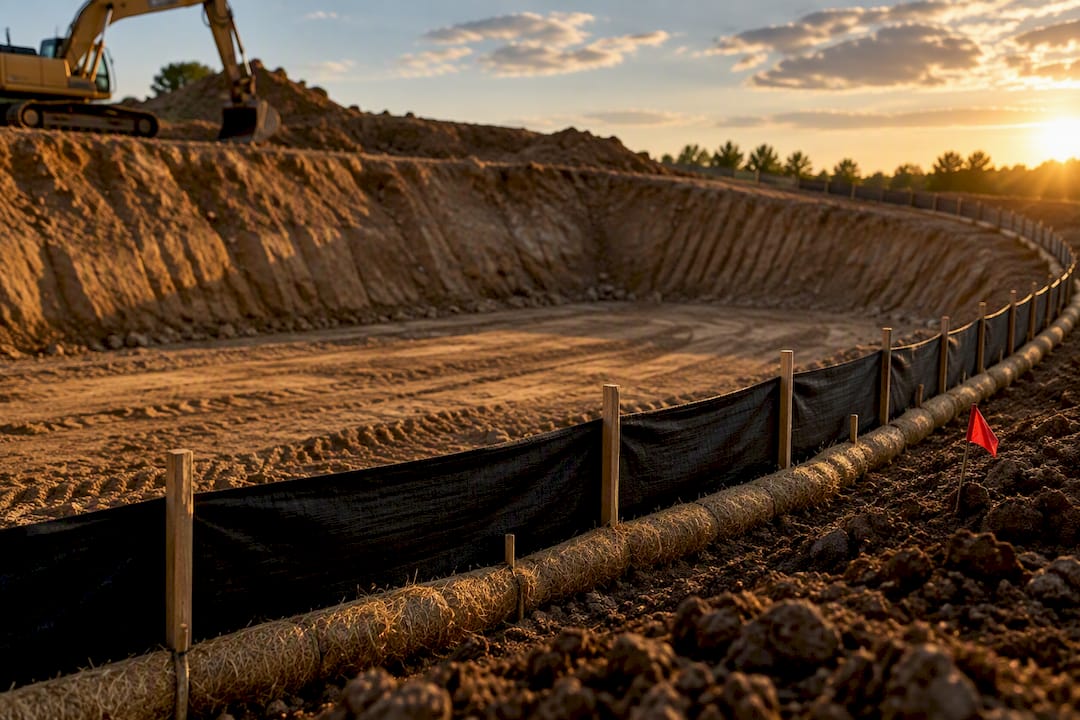
The most reliable way to control erosion during excavation is to minimize exposed soil and pair perimeter sediment controls with drainage management and prompt stabilization. Install silt fences and inlet protection before the first cut, route runoff through temporary diversions, treat dewatering discharge before it leaves the site, and stabilize every disturbed area you’re not actively working. In most jurisdictions, none of this is optional. A SWPPP or ESC plan, plus a documented inspection schedule, is required before ground disturbance starts.
TL;DR:
- Installing perimeter controls and inlet protection before excavation begins significantly reduces sediment runoff during the initial site disturbance.
- Sequencing controls from site boundaries inward, such as setting stabilizing entrances and defining disturbance zones, prevents erosion failures.
- Regular inspections, especially after storms, are critical to maintaining sediment barriers and preventing control breaches, with sediment removal before barriers reach half their height.
- Proper dewatering involves removing water with suitable pumps, treating it with sediment basins or filters, and discharging only to stable outlets to avoid violations.
- Maintaining a detailed, site-specific SWPPP with clear schedules, inspection responsibilities, and phased stabilization increases the effectiveness of erosion control.
Table of Contents
- What Comes First in Erosion Control Excavation Planning?
- How Do You Build Erosion Control Into a SWPPP or ESC Plan?
- Perimeter and Sediment Controls: Getting the Installation Right
- Grading and Temporary Drainage: Slowing Water Down
- What’s the Right Way to Handle Dewatering on an Excavation Site?
- Stabilization and Revegetation: How Fast Is Fast Enough?
- Inspection and Maintenance: The Schedule That Actually Prevents Failures
- How Cornelius Wrecking Executes Excavation-Stage Erosion Control on Complex Projects
- Two Field-Tested Priorities That Save Time and Avoid Failures
- Get an Erosion Control Scoped Estimate From Cornelius Wrecking
- Sources
- FAQ
What Comes First in Erosion Control Excavation Planning?
Sequencing determines whether your controls hold or fail. Get these in place before equipment moves dirt.
- Install perimeter controls and inlet protection first. Silt fence, filter socks, and catch basin inserts go in before clearing starts, not after runoff has already picked up sediment.
- Set stabilized construction entrances. A rock or matted entrance pad keeps mud off public roads and cuts down on tracking violations that inspectors flag immediately.
- Define limits of disturbance and stage work sectors. Fence off what you’re not touching yet. Smaller active zones mean less bare soil exposed at any one time.
- Locate temporary diversions and sediment traps wherever runoff naturally concentrates, before that concentration turns into a rill.
- Plan your dewatering route in advance, including settlement or treatment steps and a stable discharge point.
Skip this order and you’re chasing failures instead of preventing them.
How Do You Build Erosion Control Into a SWPPP or ESC Plan?
A workable SWPPP needs to function as a field document, not a binder that sits in a trailer. That means it has to include:
- A site map showing drainage patterns, disturbed areas, and every BMP location
- A written installation and stabilization schedule tied to your construction timeline
- Assigned inspection frequency, with a named person responsible for each check
- Permit documentation, since sites disturbing one acre or more typically need NPDES coverage and an approved plan
Phasing is where most plans fall apart on paper but succeed in the field. Grade in small sectors rather than opening the whole site at once, and set a hard deadline for temporary stabilization on any area that goes idle. The North Carolina Erosion and Sediment Control Field Manual lays out this hierarchy clearly: diversions and channels first, sediment traps and basins second, inlet and outlet protection layered throughout. Controls installed before disturbance consistently outperform controls added after a problem shows up.
Perimeter and Sediment Controls: Getting the Installation Right
Silt fence only works if it ponds water long enough for sediment to settle out. That means placement matters as much as material.
- Use J-hooks at fence ends, turning them upslope so the ends sit higher than the middle. This forces overtopping instead of letting water bypass the fence entirely during a heavy storm.
- Follow the rule of thumb: roughly 100 feet of silt fence per 10,000 square feet of disturbed area, adjusted for slope and drainage concentration.
- Choose static slicing over trenching where soils allow it. Slicing preserves compaction at the fabric edge, which cuts down on undercutting.
- Set post spacing and depth to resist the load of ponded water, not just wind. Undercompacted posts are the number one reason fences fail during the first real storm.
- Decide between a sediment trap and a full sediment basin based on drainage area. Traps handle small watersheds; basins earn their footprint on larger sites with concentrated flow.
- Inspect weekly and after every storm. Remove sediment once it reaches one-third to one-half of the fence height.
Pro Tip: If a section of silt fence gets so clogged that cleanout won’t restore drainage, don’t waste labor scraping it out. Install a new run of fence farther downslope instead.
Grading and Temporary Drainage: Slowing Water Down
Water gains erosive force as it gains speed, so grading strategy is really velocity control in disguise.
- Limit slope length wherever the grading plan allows, and protect the toe of every slope with a sediment barrier.
- Install diversion dikes, grass-lined channels, and level spreaders to break up concentrated flow before it becomes a gully.
- Match slope protection to the site. Erosion control blankets suit moderate slopes with fine soils; turf reinforcement mats handle steeper grades or higher flow; riprap takes over where velocities exceed what vegetation can survive.
- Coordinate grading sequences so you’re never opening more ground than your crew can stabilize within the same work week.
Soil type drives every one of these decisions. Sandy soils erode fast but drain well; clay-heavy soils resist sheet erosion but turn into a slurry problem once saturated. Know your soil before you pick your BMP, not after it fails.
What’s the Right Way to Handle Dewatering on an Excavation Site?
Dewatering follows three phases, and skipping any one of them is how clean stormwater turns into a discharge violation.
- Remove standing or seeping water from the excavation with a pump sized for the sediment load, favoring positive-displacement pumps when solids are heavy.
- Settle or treat that water before it leaves the site, using a sediment basin, filter bag, or flocculant where your permit allows it.
- Discharge to a stable outlet. Never route dewatering flow onto newly seeded ground or into sensitive areas without treatment first, and stabilize the discharge channel itself.
Log every dewatering event, including flow estimates and visual clarity observations, in your inspection records.
Stabilization and Revegetation: How Fast Is Fast Enough?
Bare soil left idle for more than about 14 days typically triggers a temporary stabilization requirement under most state guides, and the field consequences of missing that window show up fast in the form of rills.
- Use temporary seed, straw mulch, or erosion control matting on areas paused for weeks, not months.
- Move to permanent measures, seeding, sodding, or turf reinforcement mats, once grading is final and the area won’t be disturbed again.
- Consider hydroseed or a fiber-reinforced matrix on steep or difficult-access slopes where standard seeding won’t take, but recognize these products struggle wherever concentrated flow crosses the treated area.
- Strip and stockpile topsoil for reuse, and cover and fence every stockpile so wind and rain don’t turn it into your next sediment source.
Inspection and Maintenance: The Schedule That Actually Prevents Failures
Most BMP failures trace back to missed maintenance, not bad design. Build the inspection routine into the schedule from day one.
- Inspect every control weekly, and again within 24 hours of any rainfall of half an inch or more, or per your permit’s specific trigger.
- Check for fabric tears, undercutting at fence bottoms, overtopping, sediment depth against barriers, and discharge clarity at every inlet.
- Remove sediment once it hits one-third to one-half of barrier height, and repair damaged posts or fabric before the next storm, not after.
- Log every inspection with a signature, date, and corrective action taken, and retain those records for the length your permit specifies.
How Cornelius Wrecking Executes Excavation-Stage Erosion Control on Complex Projects
Erosion control on a demolition or excavation site rarely stands alone. It’s tangled up with hazardous material handling, mass earthwork sequencing, and a hauling schedule that has to keep pace with the grading plan.
- Capabilities like site clearing, mass earthwork, and dump trucking can help streamline scheduling compared to coordinating multiple subcontractors.
- Certifications in safety and hazardous material handling are important because disturbing contaminated soil or structures without proper handling can escalate erosion problems into regulatory issues.
- Having equipment and a dedicated crew in-house can reduce the time between identifying erosion control issues and resolving them. -.
Two Field-Tested Priorities That Save Time and Avoid Failures
Maintenance planning and access stabilization get less attention than the design specs, and they’re where most budgets quietly bleed. A crew that can reach a failing silt fence in five minutes saves more sediment than a fence with a slightly better fabric rating. Quantify erosion control as its own line item in every bid. Treating it as a rounding error is how it becomes a change order later.
— Zach
Get an Erosion Control Scoped Estimate From Cornelius Wrecking
Some companies handle excavation and demolition with certified crews and equipment to avoid subcontracting mid-project. Integrating site clearing, mass earthwork, hauling, and certified hazardous material handling helps maintain compliance and project continuity.

If you’re scoping a project that involves excavation near sensitive drainage, contaminated soils, or a permit deadline you can’t miss, put together a site map, your estimated disturbance acreage, a rough schedule, and any known sensitive features (wetlands, waterways, neighboring structures) before you reach out. That’s what turns a vague quote request into an accurate one. Visit the Cornelius Wrecking services page to see the full range of demolition, excavating, and hauling capabilities, or contact the team directly through Corneliuswrecking to start scoping your next project.
Sources
For installation specs on silt fence spacing, J-hooks, and maintenance thresholds, the EPA’s silt fence guidance is the primary technical reference. For building a permit-ready plan, the EPA SWPPP guide covers required elements and inspection frequency. State-level field manuals, like the North Carolina Erosion and Sediment Control Field Manual, give the fullest BMP hierarchy and sizing guidance, while the Maine DEP erosion and sediment control guidance is worth checking for dewatering and discharge siting rules.
- EPA — Stormwater pollution prevention plan (SWPPP) guide
- North Carolina Erosion and Sediment Control Field Manual
FAQ
What Is the Best Method for Erosion Control on an Excavation Site?
Minimizing exposed soil duration through staging is the single most effective control, paired with perimeter sediment barriers installed before disturbance begins. Backing that up with temporary drainage measures and fast stabilization once grading finishes closes most of the gap that causes site failures.
How Much Does Excavation Cost Per Hour?
Excavation pricing depends heavily on soil conditions, equipment needed, site access, and disturbance scope, so there’s no single hourly figure that applies across projects. Cornelius Wrecking provides scoped estimates based on the specific site through its services page rather than a flat rate.
What Are the Four Types of Excavation?
Common categories include topsoil excavation, rock excavation, muck excavation (for saturated or unstable soil), and cut-and-fill excavation for grading. Each requires different equipment and, often, different erosion control approaches depending on soil erodibility.
How Much Does an Erosion Control Plan Cost?
Plan costs vary by site size, disturbance acreage, and local permit complexity, since a SWPPP for a one-acre residential lot looks nothing like one for a multi-phase industrial site. Current pricing for Cornelius Wrecking’s excavation and site clearing services is available directly through its services page.
Planning a demolition or excavating project?
Get a fast, no-obligation quote from Cornelius Wrecking.
Request a Quote